The Chisos Mountains offer some of the most memorable scenery in Big Bend National Park. Towering cliffs, rugged slopes, shaded canyons, and sweeping desert views make this part of West Texas especially rewarding for hikers.
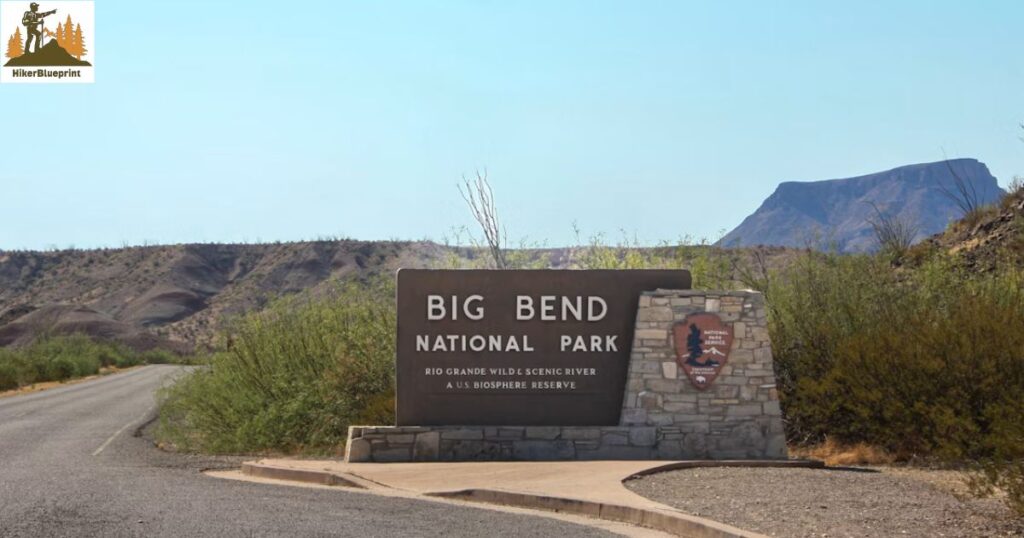
Among the area’s most popular routes, the Window Trail stands out for its unusual destination. The trail descends from the Chisos Basin into Oak Creek Canyon before reaching a narrow opening in the mountains. From there, the surrounding rock frames a spectacular view of the desert far below.
However, the scenery is only part of the experience. You’ll pass through changing landscapes, encounter interesting desert and mountain vegetation, and experience the dramatic difference between the shaded canyon and the open terrain above.
The Window Trail hike also demands preparation. Although the descent may feel manageable, returning to the trailhead means climbing back uphill. Heat, uneven footing, and slippery rock near the Window require careful attention.
This guide explains what to expect, how to prepare, when to hike, and what to know before setting out.
Window Trail at a Glance
Before planning your hike, review the essential trail information. These details will help you decide whether the route fits your available time, experience, and fitness level.
| Trail Detail | Information |
|---|---|
| Location | Chisos Basin, Big Bend National Park, Texas |
| Main trailhead | Chisos Basin Visitor Center and Store area |
| Round-trip distance | Approximately 5.5 miles |
| Elevation change | Approximately 1,000 feet |
| Difficulty | Moderate |
| Typical hiking time | About 3 hours, potentially longer depending on pace and conditions |
| Route type | Out and back |
| Main highlight | The Window pour-off and its desert views |
| Terrain | Rocky dirt paths, descending slopes, canyon terrain, and slickrock |
| Water | Bring sufficient drinking water; do not depend on natural water sources |
| Pets | Dogs and other pets are prohibited on park trails |
| Shorter alternative | Window View Trail, a paved 0.3-mile loop |
The figures above are based primarily on the National Park Service’s official trail information. Distances and elevation figures can differ depending on the starting point and the particular park guide consulted. Check current official information before your visit. (National Park Service)
What Makes ThE Window Trail Hike Special?
Some hikes reward you with a panoramic viewpoint at the summit. Window Trail offers a different experience because the destination lies below the surrounding mountains.
As you descend into Oak Creek Canyon, the landscape gradually changes. Open slopes give way to taller vegetation, rocky walls, and shaded sections of the canyon. The scenery becomes more enclosed as you approach the Window.
At the end, a narrow opening between the rocks reveals the desert beyond. The contrast between the shaded canyon and the bright landscape outside creates one of the park’s most recognizable views.
The route also provides opportunities to notice the region’s natural diversity. Depending on the season and conditions, you may see flowering plants, birds, and other wildlife along the way.
For many visitors, the appeal lies in the journey as much as the destination. The changing scenery makes the descent interesting, while the uphill return provides a satisfying finish.
The Window’s Distinctive View
The Window is a natural opening formed by erosion in the Chisos Mountains. The surrounding rock creates a frame through which hikers can look toward the desert below.
The viewpoint feels different from an exposed mountain summit. Instead of looking outward from a broad ridge, you’re standing within a rocky canyon where the landscape funnels toward a narrow opening.
That distinctive setting makes the destination especially appealing to photographers. The rock walls provide a strong foreground, while the desert beyond adds depth to the view.
Take your time when you arrive, but remain well back from dangerous edges. The rock can be slippery, and the drop beyond the pour-off makes an accidental fall potentially fatal.
A Changing Mix of Mountain and Desert Scenery
The Chisos Basin is an interesting place to explore because its mountain environment differs from the hotter, drier desert below.
The Window Trail passes through open vegetation before entering the more enclosed canyon. As you move between these environments, pay attention to changes in shade, plant life, and the shape of the surrounding terrain.
The National Park Service identifies the route as an example of Big Bend’s diverse habitats. Plant life along the trail includes species associated with both open grassland and more sheltered canyon environments.
These changes give the hike more variety than a simple walk to a viewpoint. Even if you spend only a few minutes at the final opening, the journey offers plenty to notice along the way.
Where Does the Window Trail Start?
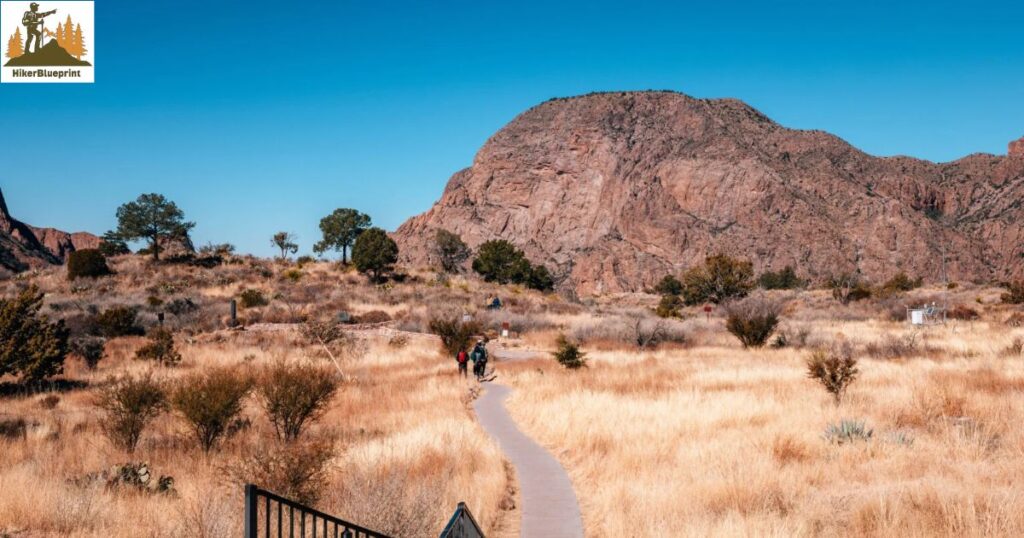
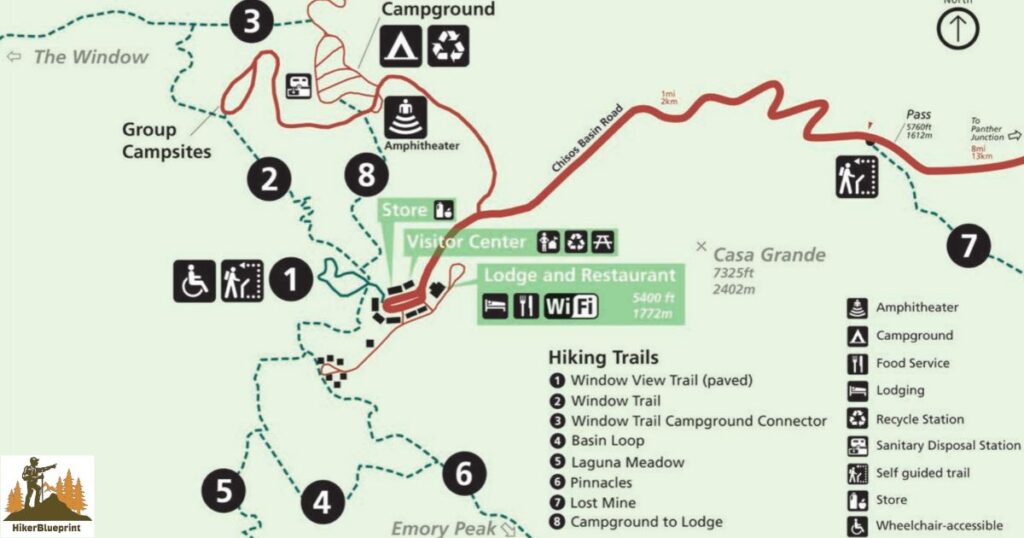
The main starting point of the Window Trail is near the Chisos Basin Visitor Center and Store area. This developed part of Big Bend National Park provides access to several mountain trails and is a convenient base for exploring the basin.
Follow the signs for the Window Trail rather than relying solely on a map application. Once you reach the trailhead, confirm that you’re following the intended route before beginning your descent.
The main route is the longer option, covering approximately 5.5 miles round trip. An alternative starting point near the Basin Campground can shorten the hike, although official sources report somewhat different distances for this variation.
Starting at the Chisos Basin Trailhead
The upper trailhead is a suitable starting point for hikers who want to experience the full route from the developed basin area.
The trail begins near the visitor facilities and descends along rocky terrain. The early section includes steps and sloping ground, so pay attention to your footing rather than rushing downhill.
The descent can make the journey feel easier than expected. However, remember that every foot you lose in elevation must eventually be regained on the return trip.
Before leaving, check the latest park alerts and trail information. Conditions, access arrangements, and available facilities can change.
Starting Near the Basin Campground
Hikers looking for a shorter route can investigate the alternative trailhead near the Basin Campground.
The National Park Service’s trail information describes this option as approximately four miles round trip with around 600 feet of elevation change. Other official park materials report different figures for the shorter route, so verify the current route description before choosing it.
If you use the campground trailhead, follow the park’s parking instructions. The National Park Service advises visitors not to park inside the campground for access to this trailhead and identifies the Amphitheater parking area as the appropriate parking location.
This alternative can be useful if you want to reduce the distance. Nevertheless, it still includes uneven terrain and a return climb.
How Difficult Is the Window Trail?
The National Park Service classifies the Window Trail as moderate. That rating is more helpful than describing the route as easy simply because much of the outward journey descends.
Your overall experience will depend on fitness, hiking experience, weather, footwear, and how comfortable you are walking on uneven surfaces.
The main challenge is the combination of downhill travel, rocky terrain, and the climb back to the starting point. The final canyon section also requires extra care because smooth rock can become slippery.
The Downhill Journey
The Window Trail descends from the Chisos Basin toward Oak Creek Canyon. In the beginning, the route follows rocky dirt paths through open vegetation and gradually leads into more sheltered terrain.
Although downhill walking generally requires less cardiovascular effort than climbing, it can place extra strain on your knees and ankles. Loose rocks and uneven steps also make balance important.
Use a controlled pace and avoid running downhill. If you’re hiking with children or less experienced walkers, allow everyone enough time to negotiate the rougher sections safely.
The Uphill Return
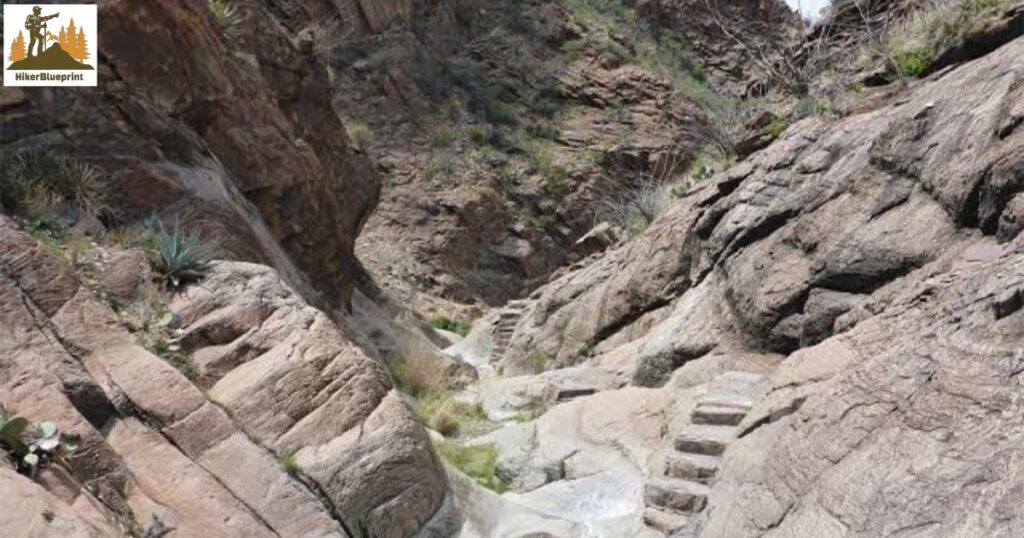
The return journey is where the hike can become more demanding.
After reaching the Window, you’ll retrace your route uphill toward the Chisos Basin. The climb gains back much of the elevation lost during the descent, so fatigue can become more noticeable near the end.
Take short breaks when necessary and drink water regularly. A steady pace is generally more sustainable than starting quickly and exhausting yourself before the final climb.
If you already feel tired during the outward journey, reconsider how much energy you’ll need to return. Reaching the viewpoint is only half the hike.
Is It Suitable for Beginners?
Beginners who are reasonably fit and comfortable walking on uneven ground may find the route manageable with careful preparation.
However, this isn’t the best choice for every first-time hiker. The distance, elevation change, exposed sections, and rocky footing can be challenging for people who rarely exercise outdoors.
If you prefer an easier introduction to the Chisos Basin, consider the Window View Trail instead. It offers a short, paved walk with mountain scenery and a view toward the Window without requiring the longer canyon hike.
What to Expect Along the Route of Window Trail
The route becomes more interesting as you move away from the developed basin and into the canyon. Allow time to observe the landscape instead of treating the hike as a race toward the final viewpoint.
The following sections describe the general progression of the hike. Exact conditions can vary with weather, erosion, and seasonal water flow.
Leaving the Chisos Basin
The hike begins in the mountain environment surrounding the Chisos Basin.
At first, you’ll travel through open vegetation with views of the surrounding slopes. The path gradually descends, and the changing elevation helps reveal different angles of the mountains.
This is a good place to establish a comfortable pace. Avoid using all your energy on the outward section, particularly if you’re not accustomed to hiking downhill for an extended period.
You may also notice that temperatures and shade vary along the route. Conditions at the trailhead won’t necessarily match those farther down the canyon.
Entering Oak Creek Canyon
As you descend, the terrain becomes more enclosed and the canyon walls become a more prominent part of the scenery.
The change in surroundings gives the hike much of its character. Rather than following a single exposed slope, you’ll pass through an environment shaped by rock, drainage, and vegetation.
Oak Creek may contain flowing water during wetter periods. When water is present, hikers may need to cross the creek at several points. The National Park Service recommends caution because conditions can affect footing and the difficulty of crossings.
Do not assume the creek will be dry or that a crossing will be safe simply because another hiker crossed earlier. Assess conditions carefully and follow current park guidance.
Approaching the Window
The final section leads toward the rocky opening at the end of the canyon.
Here, the terrain becomes especially important. The National Park Service warns that the final portion includes slickrock where footing can be difficult, particularly when surfaces are wet.
Move carefully and give yourself enough time to navigate the uneven ground. Avoid stepping onto surfaces that look slippery or approaching edges for a better photograph.
If you encounter conditions that exceed your comfort level, turn around rather than taking unnecessary risks. The scenery is impressive, but no viewpoint is worth a serious fall.
Reaching the Window Viewpoint
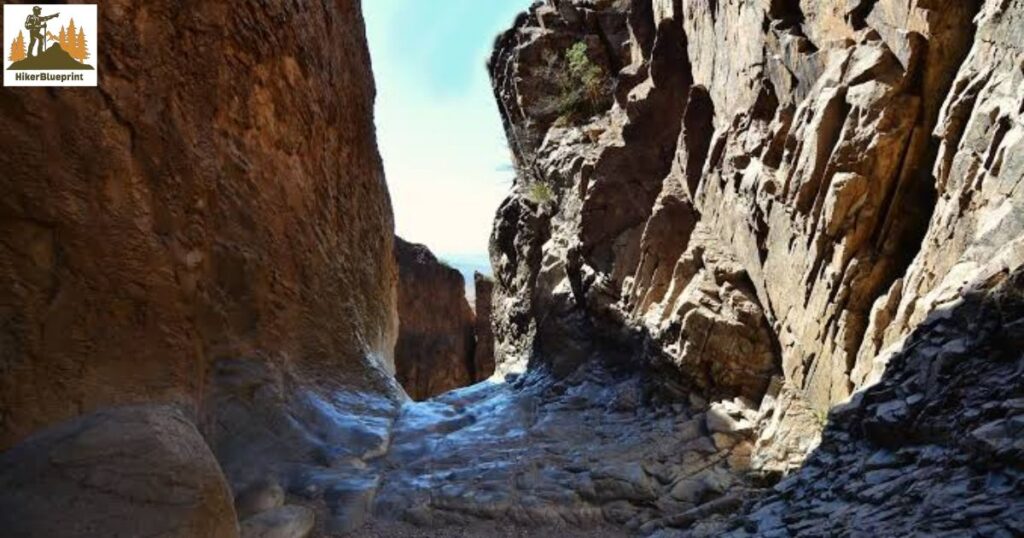
At the destination, the canyon opens toward a view of the desert below.
The surrounding rock creates a natural frame, making the landscape appear almost like a window cut into the mountains. Depending on the light and weather, the colors and contrasts can change considerably.
Find a safe place to stop, enjoy the view, and take photographs from stable ground. Keep away from the edge and avoid crowding other hikers who may be moving through the narrow area.
Once you’ve finished, prepare for the uphill journey. Check your water supply, eat a snack if needed, and allow yourself a moment to recover before retracing the route.
Best Time to Hike the Window Trail
The best time for your Window Trail hike depends on temperature, weather, daylight, and personal preference.
Big Bend’s elevation changes create different conditions across the park. The Chisos Mountains are generally cooler than the lower desert, but that doesn’t eliminate the need to prepare for heat or sudden weather changes.
Before leaving, check the official park forecast and current alerts. The National Park Service provides weather information and explains how conditions vary with elevation.
Spring
Spring can be an appealing time to explore the Chisos Basin because temperatures are often more comfortable than during the hottest part of the year.
Depending on rainfall and seasonal conditions, you may see flowering plants and increased wildlife activity. The National Park Service specifically notes that several plant species along the Window Trail can be worth looking for during early spring.
However, comfortable temperatures are not guaranteed. Check the forecast before setting out and bring clothing suitable for changing conditions.
Summer
Summer requires particular care because heat can make hiking strenuous and increase the risk of dehydration.
Even when the Chisos Basin feels cooler than the surrounding desert, exposed sections can still become hot. Start early, avoid unnecessary exertion during the hottest hours, and carry adequate water.
If temperatures or weather conditions make the hike unsafe for your group, choose another activity or postpone the hike.
Fall
Fall can offer a welcome break from summer heat, making it an attractive season for outdoor exploration.
Conditions still vary, so don’t assume every autumn day will be cool. Check the forecast and remember that the shaded canyon and open slopes may feel different.
The shorter daylight hours later in the season also make an early start useful. Leave enough time to complete the return climb before darkness.
Winter
Winter can provide pleasant hiking conditions, but temperatures may vary considerably.
The National Park Service notes that winter in Big Bend can include mild, sunny periods as well as cloudy weather and freezing conditions. Snow is uncommon but possible in the mountains.
Bring layers and check the forecast before leaving. Shaded rock and damp surfaces can make footing more difficult, even when the weather feels comfortable elsewhere.
What to Bring on the Window Trail
Preparation matters on this route because the hike combines a moderate distance with a significant elevation change.
You don’t need an elaborate collection of equipment, but you should carry the essentials and avoid relying on facilities or water sources along the way.
Water and Electrolytes
Bring enough water for the entire hike, including the uphill return.
The National Park Service recommends carrying approximately one liter of water per person for every hour of planned hiking. Individual needs vary with temperature, exertion, health, and other factors, so this should be treated as a planning baseline rather than a guarantee that one fixed amount will be sufficient.
Carry extra water when conditions warrant it. Electrolyte replacement and suitable snacks may also help during longer or hotter hikes.
Never assume that water in a creek is safe to drink without appropriate treatment.
Footwear
Choose sturdy hiking shoes or boots with good traction and a comfortable fit.
The route includes rocky dirt paths, uneven steps, and slickrock near the destination. Footwear that performs well on loose or uneven surfaces can help you maintain balance.
Avoid wearing new shoes for the first time on a demanding hike. Blisters and discomfort can make the return climb considerably harder.
Clothing and Sun Protection
Wear clothing suited to the forecast and the elevation.
A lightweight layer can be useful when shaded sections feel cooler than the exposed trail. During warmer weather, breathable clothing and sun protection are important.
Bring a wide-brimmed hat or another suitable form of head protection, sunglasses, and sunscreen. Apply sunscreen as directed and reapply when necessary.
Food and Navigation
Pack snacks that are easy to carry and eat during breaks.
A small meal can be helpful if you plan to spend time at the viewpoint or expect the hike to take longer than the average estimate.
Carry a reliable map or navigation resource and know the route before starting. Keep your phone charged, but don’t assume you’ll have reliable mobile service throughout the park.
Essential Packing Checklist for Window Trail
Before leaving the trailhead, make sure you have:
- Plenty of drinking water.
- Snacks or a packed meal.
- Sturdy footwear with good traction.
- Sun protection.
- Weather-appropriate clothing.
- A map or reliable navigation resource.
- A charged phone.
- A small first-aid kit.
- A flashlight or headlamp if there’s any possibility of returning late.
- Any personal medication you may need.
Adjust your packing list to the season, forecast, and needs of your hiking group.
Safety Tips for Hiking the Window Trail
The Window Trail is a popular route, but its popularity doesn’t remove the risks associated with canyon terrain, changing weather, or a demanding return climb.
A little preparation can make the experience more comfortable and help you avoid preventable problems.
Start Early
Starting early gives you more time to complete the hike before the hottest part of the day.
It also provides flexibility if you need additional breaks or encounter slower-than-expected conditions. Remember that the three-hour estimate is an average, not a deadline.
Check the forecast and adjust your plans if high temperatures or storms are expected.
Watch Your Footing Near the Window
The final section is one of the most important places to slow down.
The National Park Service warns that the slickrock near the Window can be difficult to navigate and that the top of the pour-off has no protective railing. Wet surfaces can make footing especially dangerous.
Stay away from the edge, avoid risky photographs, and don’t climb onto unstable or slippery rock for a better view.
Understand the Weather
Conditions can change during a hike, and the canyon environment may differ from the trailhead.
Check official weather information before departure. If thunderstorms, flash flooding, extreme heat, or other hazardous conditions are forecast, reconsider your plans.
Never enter a flooded drainage or attempt a dangerous crossing simply to finish the hike.
Respect Wildlife
Big Bend is home to wildlife that deserves space and respect.
Keep your distance from animals, never feed them, and store food responsibly. Avoid approaching wildlife for photographs or attempting to attract animals to the trail.
The National Park Service also identifies bears and mountain lions among the animals visitors should be aware of in the park. Although encounters are not inevitable, hikers should understand the relevant wildlife guidance before visiting.
Know When to Turn Around
A successful hike doesn’t always mean reaching the destination.
If someone in your group becomes unwell, runs low on water, struggles with the terrain, or faces deteriorating conditions, reassess the plan.
Turning around early can be the safest decision. Give yourself enough time and energy to return rather than pushing onward simply because the viewpoint is close.
Can You Hike the Window Trail With Kids?
Families can consider the route if their children are comfortable walking several miles on uneven ground and can manage the return climb.
However, the distance and terrain mean that this is not automatically an easy family outing. Younger children may need frequent breaks, and the final rocky section requires close supervision.
Before choosing the Window Trail hike, consider each child’s walking ability, experience, attention span, and tolerance for heat. Make sure everyone understands that the return journey climbs uphill.
For families seeking a gentler alternative, the Window View Trail provides a much shorter experience.
The Window View Trail as an Alternative
The Window View Trail is a paved loop of approximately 0.3 miles near the Chisos Basin visitor facilities.
The National Park Service describes it as easy and wheelchair accessible, with a small elevation change and views of the surrounding mountains and the Window. Benches provide places to rest and enjoy the scenery.
This alternative is useful for visitors with limited time, families with very young children, and people who prefer a short walk.
It does not replace the longer canyon hike, but it offers a way to enjoy the basin’s scenery without committing to several miles of rugged terrain.
Is the Window Trail Dog-Friendly?
No. Dogs and other pets are not allowed on hiking trails in Big Bend National Park.
If you’re visiting with a dog, plan your activities around the park’s pet restrictions. Do not assume that a trail becomes pet-friendly because it is short or paved. The Window View Trail is also subject to the park’s trail restrictions.
Check the official park guidance before your visit to understand where pets are permitted and what restrictions apply.
What Else Can You Do in the Chisos Basin?
If you’re spending time in the Chisos Basin, you can combine the hike with other activities depending on your schedule and fitness.
The area provides access to several trails and viewpoints, making it possible to plan a short visit or spend more time exploring the mountain environment.
Walk the Window View Trail
Even if you complete the longer hike, the Window View Trail can be a pleasant place to enjoy the surrounding scenery.
Its paved surface and short distance make it accessible to a broader range of visitors. The viewpoint is also a popular location for watching the sunset over the basin.
Explore Other Chisos Basin Trails
The basin serves as a starting point for several other hikes.
The National Park Service lists routes such as the Chisos Basin Loop, Lost Mine Trail, Emory Peak, and South Rim Trail among the area’s hiking options. These routes vary substantially in distance, elevation gain, and difficulty.
Choose another hike based on your available time and experience. Avoid combining multiple demanding routes simply to fit as much as possible into one day.
Plan a Broader Big Bend Visit
Big Bend National Park includes mountain, desert, and river environments, so the Chisos Basin is only one part of a larger visit.
The National Park Service provides suggested itineraries to help visitors choose activities based on the time they have available. These plans can help you decide whether to combine a hike with scenic drives, visitor exhibits, or other park highlights.
Before setting out for another area, check driving distances, road conditions, available facilities, and the time needed to reach your next destination.
Frequently Asked Questions
How long does the Window Trail hike take?
Most hikers should allow approximately three hours for the main route. Your actual time will depend on fitness, breaks, weather, and trail conditions.
Is the Window Trail difficult?
The route is rated moderate. The uphill return, uneven footing, and rocky terrain near the Window make it more demanding than a simple nature walk.
How far is the Window Trail hike?
The main route is approximately 5.5 miles round trip from the Chisos Basin trailhead. A shorter campground starting option is also available, but verify its current distance before leaving.
Is the Window Trail hike suitable for beginners?
It can suit reasonably fit beginners who prepare carefully and feel comfortable on uneven terrain. Visitors seeking an easier option can choose the paved Window View Trail.
Can you reach the Window Trail without completing the long hike?
You can see the Window from the shorter Window View Trail. However, this viewpoint is different from reaching the end of the longer canyon route.
Do you need to bring water for Window Trail?
Yes. Carry enough water for the full hike and allow for additional needs in hot weather. Don’t depend on natural water sources along the route.
Are dogs allowed?
No. Dogs and other pets are prohibited on park hiking trails, including the Window Trail.
Final Thoughts
The Window Trail offers a rewarding way to experience the changing landscapes of Big Bend National Park. The descent into Oak Creek Canyon, the surrounding rock walls, and the final view through the Window make the route memorable.
Still, the hike deserves more preparation than its downhill beginning might suggest. The return climb, uneven terrain, and slippery rock near the destination require a sensible pace and careful footing.
Start early, bring enough water, and check current park conditions before setting out. If the longer route doesn’t suit your plans, the paved Window View Trail provides a shorter way to appreciate the scenery.
With the right preparation, you can enjoy the experience while giving yourself enough time to explore the Chisos Basin safely.
You may also like this:
Yosemite Easy Hikes With Kids: 10 Family-Friendly Trails and Stress-Free Tips
Best Time to Visit Yosemite National Park: Weather, Crowds, and Seasonal Guide

Ahmed Khubaib is a passionate hiker with over 10 years of experience in hiking, camping, and exploring trails solo and with kids.
He shares firsthand experiences, practical hiking tips, and trail guides to help adventurers explore the outdoors safely.